Friday, September 26, 2014

Gutter Maintenance

With rain finally making its appearance in the northwest, the time to check our houseʼs water defense has come! Your gutter system exists to direct water away from the house. Without it, the water would be allowed to flow into unwanted areas, causing damage to lower parts of the house. This can range from mold in the walls, to more serious problems such as damage to the foundation. Because of this, gutter maintenance is crucial to your homeʼs longevity. Taking time to keep them maintained and being quick to make repairs can as much as double the life of your drainage system. So letʼs cover some of the basics.

Screen Shot 2014-09-26 at 3.33.53 PMAs a general rule, gutters should be examined semi-annually. Ideally before the rain comes: fall, when the leaves are changing and the sun is being hidden by more clouds, and spring, just before the heavier rains make their appearance. The first thing you should look for are clogs. Leaves, dirt, and other debris will create buildup that will prevent the water from flowing normally. Most of your clogging is likely to occur at the elbow of a gutter:that is, where the gutter connects to the downspout. Occasionally, the downspout itself can
get clogged. If water goes into the elbow and does not come out the bottom, you may need to check it. Pay attention to hangovers such as trees, as this can create a need for more frequent cleaning. When examining your gutters, watch also for rust, as it can cause leaks.
One important aspect of a working gutter is the pitch. Your gutter should be leveled with a drop of approximately a sixteenth of an inch for each foot of length. You can check this a couple ways: with a chalk line and level, if you want to be very precise, or a simple way of pouring water into it, and simply watching the flow. The water should all run out without leaving any puddles or pools. If you find stagnate water, you have a low spot. To fix a low spot, check the gutter hangers. Most gutters are hung with either straps or brackets. You can add either of these to lift low spots. Itʼs best to choose one already used with the gutter.
A good prevention measure to take is to use a leaf guard and strainer. Strainers are inserted at the elbow of the downspout, and allow water to flow but prevent leaves and other large debris from entering. These are inexpensive and easy to install. Leaf guards, which can be found in metal or plastic, are similarly easy to install. The leaf guard covers your entire gutter system. Placed on top of the gutter, and underneath the first shingles of the roof, these will stay in place and keep out unwanted debris. Leaves that end up on top of the guard will often blow away on their own once dry.
If you find you have leaks in your gutter, it may be time to replace it. Depending on the size of the leak, some can be repaired, while others are telling you that section has met its end. When you find a leak that you cannot repair, you may be able to replace just the section itʼs in. If you are finding multiple leaks throughout, donʼt discount investing in a whole new system. Remember that a working gutter will protect your foundation. For a small leak in a gutter that is overall in good condition, you can repair it by covering it with a layer of plastic cement specifically designed for gutter repairs. If doing this, first clean out debris, and remove as much rust as you can from the area youʼre going to cover. You can scrape off rust with a steel brush. This is important to prevent the rust underneath the cement from spreading, causing a larger hole down the line.
When your gutter and your downspout are both in good working order, the rain will not be an adversary against your homeʼs stability. Maintenance for these, while simple, is important and effective. If you are having problems that you cannot pinpoint, or are more significant than the minor common issues covered here, call a professional to help. If you have concerns about possible damage from old leaks or poor drainage, you may also want to have your home inspected. For a qualified home inspector, go to:
A small investment now can save you on major repairs water damage can have down the line. Your home is worth that!
Friday, September 12, 2014

Understanding Caulk

Caulk throughout the home is the unseen protector, guarding against small cracks and leaks. It provides a seal to keep out moisture, and prevent air from leaking. The prevention of air leaks can help to keep your energy costs lower, and sealing of moisture will help prevent water damage. Subsequently , it can add aesthetic appeal by helping your paint job look clean. Let’s put the spotlight on this unsung hero.
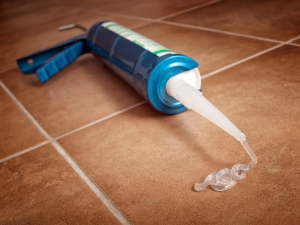
caulkThere are two primary forms of caulk: Acrylic latex and silicone. While there are a few specialty types, the majority of household jobs will use the previous two. Acrylic caulk is generally the preferred option for a few reasons. It is more convenient for many because it is less messy, and easier to work with. This caulk is a good option for sealing cracks, and filling gaps where water damage isn’t a concern. Windows, paint jobs, and wall gaps are usually satisfied with a good acrylic job. While acrylic caulk can be used for moisture prevention, overtime it is prone to cracking and shrinking. If used, it will need more frequent replacing. Silicone caulk, though more difficult to work with, is tougher, making it the appropriate option for preventing water penetration. It lasts for many years, and will not crack. It’s rubbery nature will make it an effective waterproof seal that will last, even past a decade. One of the downsides of silicone caulk is that it is not a paintable substance, making it less visually appealing in certain situations. This caulk is generally best suited for the bathroom or outdoors.
Successful application of caulk might take some practice, but there are a few tips that can help. First prepare by cutting the tip right. For most jobs, you’ll want a forty-five degree angle. Don’t cut it too large. It is better to err on the small side, as you can always cut it again a little larger if needed. Too big of an opening can create a mess. The next key is, believe it or not: confidence. A steady hand will go a long way in making a smooth application. Shaking, or slowing and speeding, can result in an uneven line and create more cleanup. Apply the first bead quickly and move at consistent pace. Avoid using too much caulk, which will need to be cleaned up and is wasteful. When applying your first bead, don’t worry about filling it completely and making it perfect. You can fix it later, make the priority a smooth line across your board. Finally, keep a damp cloth with you to wipe your hands as you go. As you apply the caulk on the crack, you don’t want to accidentally apply more, and create a mess.
A job well done is a small, but worthwhile investment that will protect your home and save you money down the line. If you are not comfortable doing this yourself, ask a professional to do it for you. Preventing water damage, and saving on energy is worth having it done right! If you need a handyman to help, check out http://www.responsiblecontractors.com/handyman.html, where you will find someone you can trust!

Friday, September 5, 2014

Hand Tools: Safety Matters

HammerTools are a common part of most households. Whether stored in the garage for special occasions, kept in the house for regular projects, or used daily, we all from time to time will find ourselves using hand tools. As common as they are, hand tools are responsible for accidents and injuries in many. Often, it takes a serious accident to occur before safety steps are taken to prevent them. The reality is, many just don’t think of it until it’s too late. So let’s look at safety precautions of and how you can take steps now that can save you an injury in the future.
According to OSHA: “The greatest hazards posed by hand tools result from misuse and improper maintenance.” Learning to use tools properly, and knowing what maintenance is required with your tools is a large precaution you can take. The first rule of tools is to use it for its designed purpose. Using a tool for a purpose for which it was not created can not only damage your tool, but it can be hazardous. Also, replace tools as necessary. If a handle is loose, using it may result in the head of the tool flying off. If it doesn’t hit someone nearby, it can damage your property. If you notice your tools are loose, sprung, or even dulled, replace it. A few extra dollars now can potentially save on medical bills later.
The next precaution you should take is safety equipment. While most know to use these with power tools, the hand tools are often forgotten. Safety goggles, gloves, hard hats, and steel-toed shoes or boots are a worthwhile if not necessary investment for those who use tools on a semi-regular basis. If you do not have these, and rarely use tools, pick up at a minimum safety goggles and gloves, which can be purchased at your local hardware store inexpensively. Also wear strong shoes, to protect your feet from anything that may drop.
When working with tools, make sure you are in a safe environment. Hammers, screwdrivers, and many other tools all require an exertion of force. As such, work on a floor that is clean, free of debris, and has strong traction so that you will not slip. Do not work near anything flammable, even if you have spark-resistant tools.


Overall, paying attention to your environment and taking small steps can make the difference between a job well-done and a trip to the hospital. While it may seem like it won’t happen to you, thousands of injuries happen every year due to hand and power tools. Don’t be one of them! If you have a job that is beyond your skill set, hire a professional to do it for you. Safety precautions will help; however, even with the proper tools and gear, doing a job too difficult is hazardous, regardless of the precautions taken. Remember that no job is so important that it is worth a trip to the hospital. You can prevent this by knowing your capabilities, using common sense and proper safety procedures.